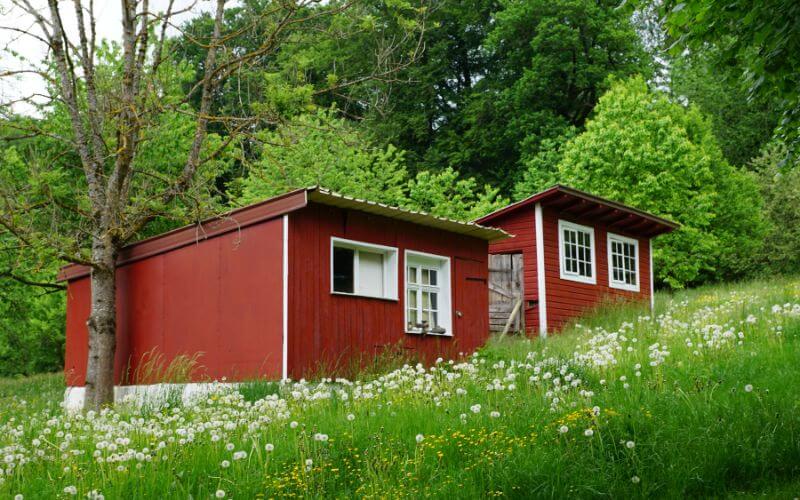
You’ve decided to build your small barn, but you’re not sure where to start. Don’t worry! This guide’s got you covered. From understanding the basics of construction to choosing materials, we’ll walk you through each step.
We’ll also provide tips on maximizing space and keeping things organized. Let’s turn that dream barn into a reality together!

Understanding the Basics of Small Barn Construction
Before we dive in, it’s important to understand the basics of small barn construction. If you’re considering australian made barns, you must know what they entail. They are renowned for their robustness and weather tolerance. So, whether your needs are for sheltering livestock or storing equipment, these barns stand up to the challenge.
You’ve got to start with a solid foundation – this is non-negotiable. Reinforced concrete slabs make an ideal base. Be mindful of orientation too; position your barn taking into account sunlight and wind direction. Don’t forget about functionality; plan your interior space wisely for optimal use.
Choosing the Right Materials for Your Small Barn
You’ll need to carefully consider which materials are best suited for the project. Wood is a common choice due to its aesthetic appeal and versatility, but it requires regular maintenance to prevent rot and pests. Metal, particularly steel, is another option you might favor for its durability and low upkeep needs.
Make sure to select high-quality roofing materials as well; anything from asphalt shingles to metal sheets could work. Remember that your barn’s roof will be exposed to weather elements year-round, so go for something sturdy and long-lasting.
Lastly, don’t skimp on the flooring material. Concrete slabs are typically used since they’re easy to clean and resistant to wear and tear. However, rubber mats can also be added for extra comfort and insulation if required.
Step-by-Step Guide to Building Your Small Barn
Let’s move on to the actual construction process, where we’ll lay out each step you need to follow to assemble a petite barn successfully.
1. Site Preparation: Choose an optimal location and level the ground. This stage will evoke your resourcefulness and strategic planning skills.
2. Laying Foundation: Pour concrete or install piers according to your plan. It’s a moment of accomplishment, seeing your project begin to take shape.
3. Building Frame & Walls: With every beam and wall erected, you’ll feel the thrill of creation and progress.
4. Installing Roof & Doors: The final touches that encapsulate all your hard work into a tangible result.
Each step is an opportunity for growth, learning, and deep satisfaction – it’s not just about building a barn; it’s about crafting a symbol of your dedication and skill.
Maximizing Space in Your Small Barn
To maximize space in that petite structure, it’s essential to think creatively about storage and layout. First off, consider loft spaces for seldom-used items, which can free up ground-level areas. Install pegboards or hooks on walls for tools, freeing up valuable floor space. Remember to use the vertical space effectively.
Consider fold-down tables or workbenches that can be stowed away when not in use. Use clear bins for storage; they’re stackable and allow you to see contents at a glance. For larger equipment, build a lean-to on the exterior of the barn as an additional storage area.
Also Read: Consider Building a Barndominium for These 6 Compelling Reasons
Organizational Tips for Your Small Barn
Keeping everything in its proper place will make it easier to find what you’re looking for and can effectively maximize the use of space. In your small barn, the organization is a must. Here are some practical tips to help you:
– Use clear bins: You can see what’s inside without having to open them.
– Label everything: It’ll save you time searching for items.
– Utilize vertical space: Install shelves or hooks on walls to keep things off the ground.
– Group similar items together: This makes it easier when you need something specific.
– Regularly declutter: Don’t let unused items take up valuable space.
Maintaining and Upgrading Your Small Barn
Maintaining and upgrading the barn isn’t just about aesthetics, it’s an important step to ensure its longevity and functionality. You’ve got to regularly check for damages, repair any broken parts, and upgrade obsolete features. But don’t feel overwhelmed! Here’s a handy table that breaks down the tasks:
| Task | Frequency | Benefit |
|——|———–|———|
| Roof Inspection | Semi-annually | Prevents leaks |
| Repair Damaged Woodwork | As needed | Strengthens structure |
| Paint Exterior | Every 2-3 years | Protects from weathering |
| Update Storage Systems | As required | Increases efficiency |
| Pest Control Measures | Annually | Keeps livestock healthy |
Conclusion
You’ve learned the ropes of small barn construction – from understanding basics, and choosing materials, to actual building.
You’ve also grasped how to maximize space and maintain your barn efficiently.
With these practical tips under your belt, you’re ready to create an organized, functional space that suits your needs perfectly.
Remember, a well-kept barn not only serves its purpose but also adds value and beauty to your property.
Keep up the good work!