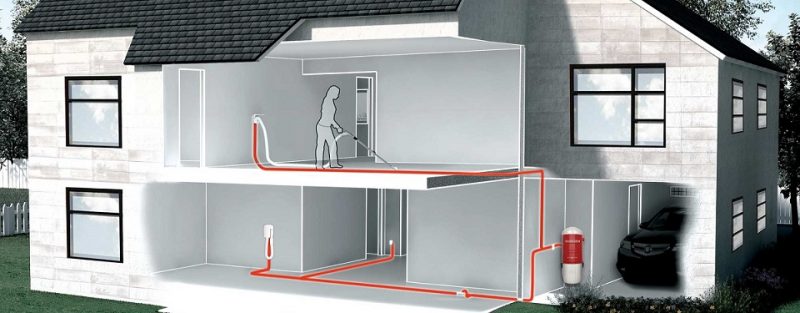
If you want to install a central vacuum system at your home, then it is not a simple and straightforward task as it might seem. But if you’re going to do anything you can do that if you do it with all concentration. If you hire the professional services of central vacuum system installers, then your work will become much more comfortable but if you do not want to hire them and do it by yourself then get ready for all the processes that you have to do step by step. No more words for you because this is going to be a complete and comprehensive guide about installation. It is possible but challenging to install a central vacuum system in your home by yourself.
In this article, we are going to discuss an installation guide for you to fit a central vacuum system, sockets, and valves by yourself. So, keep on reading to find out more information below about central vacuum system installers.

What Is A Central Vacuum System?
A central vacuum system is a vacuum unit that is installed permanently in your home. It depends on you how many outlets and sockets you want to have for the central vacuum system in your home. The more outlets that you installed in the room of your home, the higher it is going to cost you for the installation of a central vacuum system in your home.
Installation Guide
1. Installation Of The Power Unit
First of all, you need to find out where the power unite exists. It will be best if the power unit exists in your garage or a soundproof room. This way, there will be no noise pollution in your home. The central vacuum system power unit has to be fitted inside the wall according to the instruction manual.
Also Read: Tips for stable electricity supply for your home
2. Installation Of Exhaust
Once you have placed your power Union down the next step is to fit the exhaust to take the air out of the house. This way, the dirt particles will be collected during the cleaning process by the central vacuum system. Make sure that the exhaust leads to the outside in the open air. You will have to drill a hole in the wall for this purpose.
3. First Inlet Valve
If you want to keep the floor of the air to a maximum quantity and do not enjoy any potential blockages of air, then you need to avoid the 90-degree burns as much as possible. You can do this by starting back towards the unit. You can do this by fitting the first inlet valve. Make sure that you divide the whole process into smaller sections. This way, you will be able to glue every section suitably in its place. You can keep gluing until the process is finished.
4. Other Inlet Valves
After this, you need to install the remaining inlet valves. All the wall inlets have a low voltage power circuit, and you have to run back to the vacuum unit. Not only that will save you time, but also it will make your work much more comfortable.